How to Thread an Industrial Sewing Machine Correctly: A Step-by-Step Guide for Beginners
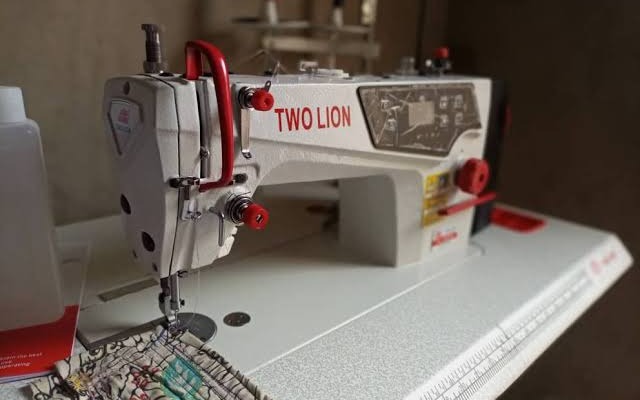
One of the first skills every fashion designer must learn is how to thread an industrial sewing machine correctly. No matter how expensive or advanced your sewing machine is, it cannot produce neat stitches if it is threaded improperly.
Incorrect threading can cause thread breakage, skipped stitches, uneven tension, bird's nests of thread, and even damage to your fabric. Fortunately, threading an industrial sewing machine becomes easy once you understand the correct process.
In this guide, you'll learn how to thread an industrial sewing machine step by step, common mistakes to avoid, and helpful tips to keep your machine sewing smoothly.
Why Proper Threading Is Important
Threading your industrial sewing machine correctly helps you:
Produce neat and balanced stitches.
Prevent thread breakage.
Reduce sewing interruptions.
Improve sewing speed and accuracy.
Protect your machine from unnecessary wear.
Taking a few extra minutes to thread your machine properly can save you hours of frustration later.
Tools You'll Need
Before you begin, make sure you have:
An industrial sewing machine.
A spool or cone of sewing thread.
A correctly installed sewing needle.
A wound bobbin.
A bobbin case (for machines that use one).
A pair of thread snips or scissors.
Step-by-Step Guide to Threading an Industrial Sewing Machine
Step 1: Turn Off the Machine
For safety, always switch off the machine before threading it. This prevents accidental movement while your hands are near the needle.
Step 2: Raise the Presser Foot
Lift the presser foot before threading.
This opens the tension discs, allowing the thread to pass through correctly. If the presser foot remains down, the thread may not enter the tension discs properly, resulting in poor stitch quality.
Step 3: Raise the Needle
Turn the handwheel toward you until the needle reaches its highest position.
This makes threading easier and ensures the take-up lever is ready to receive the thread.
Step 4: Place the Thread Cone on the Thread Stand
Position the thread cone securely on the thread stand above the machine.
Ensure the thread unwinds smoothly without catching or twisting.
Step 5: Pass the Thread Through the Thread Guide
Take the thread from the cone and guide it through the first thread guide at the top of the machine.
This helps control the thread's movement as it travels toward the needle.
Step 6: Thread the Tension Discs
Guide the thread between the tension discs.
This is one of the most important steps because the tension discs regulate the amount of pressure applied to the thread.
Improper threading here often causes loose or uneven stitches.
Step 7: Thread the Take-Up Lever
After passing through the tension mechanism, pull the thread upward and insert it through the hole in the take-up lever.
The take-up lever controls the movement of the upper thread during sewing.
Step 8: Pass Through the Remaining Thread Guides
Follow your machine's threading path by passing the thread through each remaining guide on the needle bar.
Each guide helps keep the thread aligned for smooth stitching.
Step 9: Thread the Needle
Insert the thread through the eye of the needle.
Most industrial lockstitch machines are threaded from left to right, but always check your machine's manual, as some models differ.
Pull about 10–15 cm (4–6 inches) of thread through the needle.
How to Insert the Bobbin Correctly
The lower thread is just as important as the upper thread.
Wind the bobbin evenly.
Insert it into the bobbin case in the correct direction.
Pull the thread through the tension spring of the bobbin case.
Leave a thread tail of about 10 cm (4 inches).
Incorrect bobbin placement can lead to thread tangling or inconsistent stitches.
Bringing Up the Bobbin Thread
After threading both the upper thread and the bobbin:
Hold the upper thread gently.
Turn the handwheel toward you one full rotation.
The needle will catch the bobbin thread.
Pull both threads under the presser foot and toward the back of the machine.
Your machine is now ready to sew.

Common Threading Mistakes Beginners Make
Many sewing problems are caused by simple threading errors. Avoid these common mistakes:
Threading the machine with the presser foot down.
Skipping one or more thread guides.
Forgetting the take-up lever.
Using a bent or damaged needle.
Inserting the bobbin incorrectly.
Pulling the thread too tightly.
Using poor-quality thread.
Double-check your threading whenever you experience stitching problems.
Tips for Smooth Sewing
To keep your industrial sewing machine running efficiently:
Use high-quality thread.
Change your sewing needle regularly.
Clean lint from the bobbin area.
Oil the machine according to the manufacturer's instructions.
Always rethread the machine after changing the thread cone.
Test your stitches on scrap fabric before sewing your main project.
These simple habits can greatly improve stitch quality and extend the life of your machine.
Troubleshooting Common Problems
Thread Keeps Breaking
Possible causes:
Incorrect threading.
Thread tension too tight.
Damaged needle.
Low-quality thread.
Loose Stitches
Possible causes:
Thread not seated in the tension discs.
Incorrect bobbin threading.
Upper thread tension too loose.
Thread Tangling Under the Fabric
Possible causes:
Machine threaded incorrectly.
Bobbin inserted improperly.
Failure to hold thread tails when starting to sew.
Final Thoughts
Learning how to thread an industrial sewing machine correctly is one of the most important skills every fashion designer should master. Proper threading not only improves stitch quality but also reduces machine problems, saves time, and makes sewing more enjoyable.
If you're a beginner, don't be discouraged if it takes a few attempts. With regular practice, threading your machine will become second nature, allowing you to focus on what truly matters—bringing your creative designs to life.
At Dinat Signature, we believe that mastering the fundamentals is the key to becoming an exceptional fashion designer. Start with the basics, practice consistently, and let every stitch showcase your passion for excellence.
Watch the Step-by-Step Workshop

Dinat Signature
Dedicated to preserving Nigerian artisanal textile crafts while elevating contemporary pattern cutting, couture construction, and fashion education for makers globally.
Discussion & Feedback 0
Ask tailoring questions, share results, or contribute technical advice.
No comments posted yet
Be the first to share your thoughts or questions regarding this masterclass.
Leave a Comment
Join the conversation. All messages are moderated for respectful dialogue.