Common Sewing Machine Problems and How to Fix Them: A Complete Troubleshooting Guide
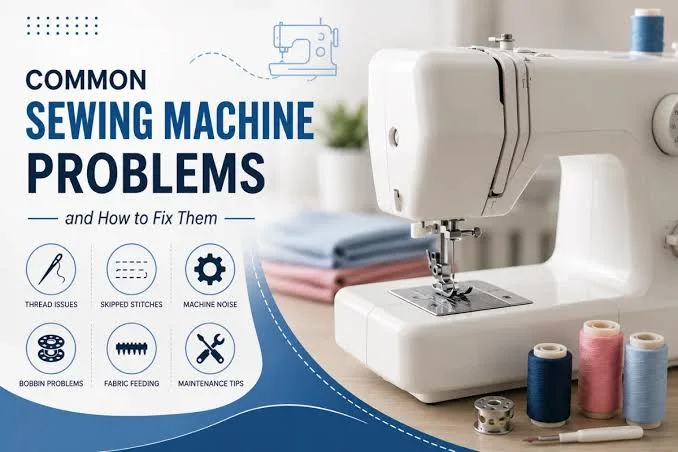
A sewing machine is one of the most important tools in fashion designing and garment production. Whether you are a professional fashion designer, an apprentice, a sewing enthusiast or someone who enjoys making clothes at home, having a properly functioning sewing machine is essential for achieving neat, consistent and professional results.
However, like every mechanical or electrical equipment, sewing machines can develop faults during use. Sometimes the machine may skip stitches, break threads, produce uneven stitches or refuse to sew altogether. These problems can be frustrating, especially when working on an important garment or trying to meet a customer's delivery deadline.
The good news is that not every sewing machine problem requires a technician. Many common sewing machine faults are caused by incorrect threading, unsuitable needle sizes, poor-quality thread, improper tension settings or a lack of regular maintenance.
Understanding these problems and knowing how to troubleshoot them can save time, reduce unnecessary repair costs and help you maintain your sewing machine in good working condition.
In this guide, we will explore common sewing machine problems, their possible causes and practical solutions for fixing them.
1. Sewing Machine Skipping Stitches
Skipped stitches occur when the sewing machine fails to form stitches consistently. Instead of producing a continuous line of stitches, the machine leaves gaps along the seam.
This problem can affect the appearance and strength of a garment.
Possible causes:
A bent, blunt or damaged needle.
Incorrect needle installation.
Using the wrong needle type for the fabric.
Incorrect threading.
A needle that is too small or too large for the fabric and thread.
Incorrect needle and hook timing.
How to fix it:
Remove the needle and inspect it for bends or damage.
Replace the needle if it is blunt, bent or worn out.
Ensure the needle is inserted correctly, following your machine's instructions.
Check that the needle size and type are suitable for your fabric.
Rethread the machine, ensuring the thread passes through all the required guides.
Test the machine on a scrap piece of fabric.
If the machine continues skipping stitches after these adjustments, the hook timing or other internal components may need professional attention.
2. Sewing Machine Thread Keeps Breaking
Thread breakage is one of the most common problems encountered by sewing machine users. It can interrupt your work repeatedly and affect the quality of your stitching.
Possible causes:
Incorrect upper thread tension.
Poor-quality or weak thread.
Incorrect threading.
A damaged needle.
Rough edges or burrs around the needle plate or thread guides.
Incorrect needle size.
Thread getting caught in the machine.
How to fix it:
Rethread the upper thread carefully, following the correct threading path.
Check the upper thread tension and adjust it gradually if necessary.
Replace damaged or poor-quality thread.
Inspect the needle and replace it if it is bent or damaged.
Check the needle plate and thread guides for rough edges.
Ensure the thread spool is positioned correctly and unwinds freely.
Important tip: Avoid increasing or decreasing the tension randomly. Make small adjustments and test the stitches before making further changes.
3. Sewing Machine Needle Keeps Breaking
A sewing machine needle should not break frequently during normal operation. If this happens repeatedly, there may be an issue with the needle, fabric, threading or machine setup.
Possible causes:
Incorrect needle size for the fabric.
Bent or incorrectly installed needle.
Pulling or pushing the fabric while sewing.
Hitting pins with the needle.
Incorrect presser foot installation.
Needle striking the needle plate or presser foot.
Incorrect machine timing.
How to fix it:
Replace the broken needle with a new one of the correct type and size.
Ensure the needle is fully inserted and correctly positioned.
Use an appropriate needle for the fabric thickness.
Avoid pulling or forcing the fabric through the machine.
Remove pins before they reach the needle.
Check that the correct presser foot is installed and properly secured.
If the needle continues hitting the needle plate or breaking, stop using the machine and have it inspected by a qualified technician.
4. Sewing Machine Fabric Is Not Moving
Sometimes a sewing machine forms stitches but the fabric does not move forward. In other cases, the fabric moves very slowly or remains in one position.
This problem is often related to the feed mechanism.
Possible causes:
Feed dogs are lowered or disengaged.
Incorrect stitch-length setting.
Lint and fabric debris around the feed dogs.
Presser foot pressure is too low.
Feed dog mechanism is damaged.
Incorrect presser foot selection.
How to fix it:
Check that the feed dogs are raised and engaged.
Adjust the stitch length to a suitable setting.
Clean lint and fabric debris from around the feed dogs.
Ensure the presser foot is properly lowered before sewing.
Check the presser foot pressure if your machine has an adjustable setting.
Test the machine using a suitable piece of fabric.
If the feed dogs do not move despite correct settings, the feed mechanism may require servicing.
5. Sewing Machine Produces Loose Stitches
Loose stitches can make a garment look untidy and weaken the seam. They may appear as loops underneath or on top of the fabric.
Possible causes:
Incorrect upper thread tension.
Improper threading.
Thread not properly seated between the tension discs.
Incorrect bobbin installation.
Damaged or incorrectly wound bobbin.
Incorrect needle and thread combination.
How to fix it:
Rethread the upper thread with the presser foot raised so the thread can enter the tension discs correctly.
Check the bobbin and ensure it is inserted according to the machine's instructions.
Inspect the bobbin for uneven winding.
Adjust the upper thread tension gradually.
Check the needle size and thread compatibility.
Sew a test seam and inspect both sides of the fabric.
A balanced stitch should have the upper and lower threads interlocking within the fabric rather than forming loose loops on either surface.
6. Sewing Machine Thread Bunching Under the Fabric
Thread bunching, sometimes called bird nesting, occurs when excess thread gathers underneath the fabric, forming tangled loops.
This problem is often mistaken for a bobbin tension problem. However, it is frequently caused by incorrect upper threading.
Possible causes:
Incorrect upper threading.
Thread not properly seated in the tension discs.
Presser foot being lowered during threading.
Thread not held correctly when starting to sew.
Incorrect bobbin installation.
Lint or thread debris in the bobbin area.
How to fix it:
Stop sewing and remove the tangled thread carefully.
Raise the presser foot and remove the upper thread.
Rethread the machine following the correct threading sequence.
Check the bobbin installation.
Clean the bobbin area and remove accumulated lint.
Hold both thread tails behind the presser foot when beginning a seam, if recommended by your machine's instructions.
Test the machine on scrap fabric.
Professional tip: Before adjusting the bobbin tension, always check the upper threading first. Incorrect upper threading is a common reason for thread bunching underneath the fabric.
7. Sewing Machine Makes Unusual Noises
A properly maintained sewing machine should operate smoothly. Loud knocking, grinding, squeaking or unusual rattling sounds may indicate that something is wrong.
Possible causes:
Lack of lubrication where lubrication is required.
Accumulated lint and dust.
Loose screws or components.
Bent or incorrectly installed needle.
Damaged internal parts.
Incorrect machine assembly.
A worn-out belt or motor component.
How to fix it:
Switch off the machine before inspecting it.
Check the needle for damage and replace it if necessary.
Remove lint and thread debris from accessible cleaning areas.
Check for loose screws or attachments.
Lubricate only the parts specified in the machine's manual.
If the noise continues, arrange for professional servicing.
Important: Not every sewing machine requires oiling in the same way. Some models have sealed or self-lubricating components. Always follow the manufacturer's maintenance instructions.
8. Sewing Machine Runs Slowly
A sewing machine that runs slower than usual can affect productivity and make sewing difficult.
Possible causes:
Low power supply or voltage fluctuations.
Motor problems.
Worn or loose drive belt.
Mechanical resistance caused by dirt or thread entanglement.
Incorrect speed control settings.
Electrical or pedal faults.
How to fix it:
Check that the power supply is stable.
Inspect the foot pedal or speed controller.
Check the drive belt for looseness or visible damage, where applicable.
Remove lint and thread entanglement from accessible areas.
Confirm that the machine is set to the appropriate speed.
Have the motor or electrical components inspected if the problem continues.
For industrial sewing machines, a faulty servo motor, motor controller or electrical connection may also cause speed-related problems.
Do not attempt to repair electrical components while the machine is connected to power.
9. Sewing Machine Is Not Picking Up the Bobbin Thread
When the upper thread fails to catch the bobbin thread, the machine may refuse to form stitches properly.
Possible causes:
Incorrect needle installation.
Incorrect threading.
Damaged or incorrectly positioned bobbin.
Bent or blunt needle.
Incorrect needle and hook timing.
Thread not properly positioned when starting.
How to fix it:
Rethread the upper thread.
Remove the bobbin and reinstall it correctly.
Check that the bobbin is wound evenly.
Replace the needle if it is damaged.
Follow your machine's instructions for bringing up the bobbin thread using the handwheel.
Test the machine on scrap fabric.
If the upper thread still fails to catch the bobbin thread, the hook timing may be incorrect and should be checked by a technician.
10. Sewing Machine Tension Is Too Tight or Too Loose
Thread tension controls how the upper and lower threads interlock to form a balanced stitch.
Incorrect tension can result in loose stitches, puckering, visible thread loops or thread breakage.
Possible causes:
Incorrect tension settings.
Improper threading.
Wrong needle and thread combination.
Incorrect bobbin installation.
Dirt trapped inside the tension assembly.
Damaged tension components.
How to fix it:
Check the upper thread and bobbin threading.
Ensure the thread is properly seated in the tension discs.
Confirm that the needle and thread are suitable for the fabric.
Adjust the upper thread tension gradually.
Sew on a scrap piece of the same fabric.
Examine the stitches on both sides before making further adjustments.
Avoid changing the bobbin tension unless necessary and unless you understand the correct adjustment procedure for your machine.
11. Sewing Machine Motor Is Running but the Machine Is Not Sewing
This problem can occur when the motor operates but the needle or machine mechanism does not move as expected.
Possible causes:
Loose or broken drive belt.
Handwheel disengaged or incorrectly positioned.
Clutch or drive mechanism problem.
Mechanical obstruction.
Motor coupling fault.
How to fix it:
Switch off and unplug the machine.
Check whether the handwheel is engaged according to the machine's instructions.
Inspect the drive belt for visible damage or looseness, if accessible.
Check for thread or fabric trapped in the mechanism.
Avoid forcing the handwheel.
If the machine still fails to operate, it is best to contact a sewing machine technician.
12. Sewing Machine Is Not Turning On
An electrical sewing machine that refuses to power on may have a power supply problem or an internal electrical fault.
Possible causes:
Loose power connection.
Faulty socket.
Damaged power cable.
Faulty foot pedal.
Blown fuse, where applicable.
Motor or electrical control fault.
How to fix it:
Check that the power cable is properly connected.
Test the wall socket with another suitable electrical appliance.
Inspect the power cable for visible damage.
Check the machine's power switch.
Consult the manual for any user-serviceable fuse or reset procedure.
If the machine still does not turn on, have it checked by a qualified technician.
Never open the motor housing or attempt electrical repairs while the machine is connected to power.
13. Sewing Machine Needle Gets Stuck
A stuck needle can prevent the machine from operating and may cause further damage if the user forces the handwheel or continues pressing the pedal.
Possible causes:
Thread tangled around the bobbin area.
Fabric caught beneath the presser foot.
Needle bent or incorrectly installed.
Heavy fabric being forced through the machine.
Mechanical obstruction.
Damaged internal components.
How to fix it:
Turn off and unplug the machine.
Raise the presser foot if possible.
Carefully remove the fabric without pulling forcefully.
Remove tangled thread from the bobbin area.
Replace a damaged needle.
Check that the needle is correctly installed.
Turn the handwheel gently to check whether the mechanism moves freely.
If the needle remains stuck, do not force it. Seek professional assistance.
14. Sewing Machine Leaves Uneven or Puckered Stitches
Puckering occurs when the fabric gathers along the seam instead of lying flat. Uneven stitching can also make a finished garment look unprofessional.
Possible causes:
Excessive thread tension.
Incorrect needle size.
Poor-quality or unsuitable thread.
Incorrect stitch length.
Fabric being stretched or pulled during sewing.
Incorrect presser foot pressure.
Fabric not suitable for the selected sewing technique.
How to fix it:
Select a suitable needle for the fabric.
Adjust the thread tension gradually.
Use good-quality thread.
Adjust the stitch length according to the fabric and sewing technique.
Avoid pulling or stretching the fabric while sewing.
Use an appropriate presser foot.
Test the settings on a fabric scrap before sewing the actual garment.
For lightweight and stretchy fabrics, using the correct needle and suitable stabilizing techniques can help prevent puckering.
15. Sewing Machine Foot Pedal Is Not Responding Properly
The foot pedal controls the speed of many electric sewing machines. When it becomes faulty, the machine may refuse to start, respond slowly or run inconsistently.
Possible causes:
Loose pedal connection.
Damaged pedal cable.
Faulty speed controller.
Electrical problems.
Internal pedal wear.
How to fix it:
Switch off the machine.
Check that the pedal connection is secure.
Inspect the cable for visible damage.
Ensure the pedal is placed on a stable surface.
Consult the machine's manual for recommended troubleshooting steps.
If the pedal still does not respond properly, it may need professional inspection or replacement.
Essential Sewing Machine Maintenance Tips
Preventive maintenance is one of the best ways to reduce sewing machine problems and extend the life of your equipment.
Whether you use a domestic sewing machine or an industrial sewing machine, regular care should be part of your sewing routine.
Here are some important maintenance practices:
1. Clean Your Machine Regularly
Remove lint, dust and thread fragments from the bobbin area, feed dogs and other accessible parts. Fabric debris can affect machine performance over time.
2. Change Your Needle Frequently
A sewing machine needle becomes dull with use. Replace it when it becomes blunt, bent or damaged, and choose the correct needle for your fabric.
3. Use Good-Quality Thread
Poor-quality thread can cause frequent breakage, lint accumulation and inconsistent stitches.
4. Use the Correct Needle Size
Different fabrics require different needle types and sizes. Using the correct needle improves stitch formation and reduces damage to the fabric.
5. Follow the Manufacturer's Oiling Instructions
Some machines require regular lubrication, while others have specific lubrication-free components. Use the recommended sewing machine oil only where instructed.
6. Cover Your Machine When Not in Use
Protecting your sewing machine from dust and moisture helps keep its components in better condition.
7. Schedule Professional Servicing
Regular professional servicing helps identify worn-out components and mechanical problems before they become serious.
8. Avoid Forcing the Machine
Do not force thick fabric through a machine that is not designed to handle it. Use suitable needles, presser feet and machine settings for the material.
Domestic vs Industrial Sewing Machine Problems
Although domestic and industrial sewing machines perform similar basic functions, their construction, operating speed and maintenance requirements are different.
Domestic sewing machines are generally designed for household sewing, repairs and light garment production. Industrial sewing machines are built for more demanding and continuous production work.
Some troubleshooting steps apply to both, such as checking the needle, threading, thread tension and bobbin.
However, industrial machines may also experience problems involving:
Servo motors and clutch motors.
Drive belts and motor connections.
Oil circulation systems.
Industrial hook and needle timing.
High-speed mechanical components.
Automatic thread trimming mechanisms, where fitted.
Always consult the appropriate machine manual before attempting adjustments to internal components.
When Should You Call a Sewing Machine Technician?
While many sewing machine problems can be resolved through basic troubleshooting, some faults require professional attention.
Contact a qualified sewing machine technician if:
The machine continues breaking needles after proper installation.
The needle repeatedly strikes the needle plate.
The hook timing appears incorrect.
The motor overheats or produces a burning smell.
There are sparks, electrical shocks or damaged electrical cables.
The machine makes persistent grinding or knocking sounds.
Internal components are damaged.
Basic troubleshooting does not resolve the problem.
Knowing when to stop troubleshooting is just as important as knowing how to fix minor sewing machine faults.
Frequently Asked Questions About Sewing Machine Problems
1. Why does my sewing machine keep breaking threads?
Thread breakage can result from incorrect threading, excessive upper thread tension, a damaged needle, poor-quality thread or rough edges around the thread guides. Check the threading and needle before adjusting the tension.
2. Why is my sewing machine skipping stitches?
Skipped stitches are commonly caused by a bent or blunt needle, incorrect needle installation or using the wrong needle for the fabric. Replace the needle and check the threading.
3. Why is my sewing machine making loops underneath the fabric?
Loose loops underneath the fabric are often caused by incorrect upper threading or thread not properly seated in the tension discs. Re-thread the machine with the presser foot raised.
4. Why is my sewing machine not moving the fabric?
The feed dogs may be lowered, dirty or disengaged. Check the feed dog settings, stitch length and presser foot position.
5. How often should I clean my sewing machine?
Clean your sewing machine regularly, particularly after extended sewing sessions or when working with fabrics that produce a lot of lint. Follow your machine's maintenance instructions for the appropriate cleaning schedule.
6. How often should I change my sewing machine needle?
Needles should be replaced when they become dull, bent or damaged. The replacement interval depends on the fabric, needle quality and amount of sewing. If you notice skipped stitches, unusual noises or fabric damage, inspect the needle.
7. Can I fix my sewing machine myself?
Yes. Many minor problems, including incorrect threading, improper bobbin installation, dirty feed dogs and damaged needles, can be corrected at home. However, electrical faults, timing problems and major mechanical issues should be handled by qualified technicians.
Final Thoughts
A sewing machine is an essential investment for anyone involved in fashion designing and garment production. Understanding how it works and recognizing common problems can make your sewing experience easier, more productive and less stressful.
From thread breakage and skipped stitches to tension problems and unusual machine noises, many sewing machine faults can be prevented or corrected through proper handling, regular cleaning and basic troubleshooting.
Becoming a better fashion designer involves understanding not only how to create beautiful garments but also how to care for the tools and equipment used in the process.
The more you understand your sewing machine, the more confidently and efficiently you can work.
Remember: Proper sewing machine maintenance is not just about preventing breakdowns; it is about protecting your equipment, improving your workmanship and achieving better sewing results.

Dinat Signature
Dedicated to preserving Nigerian artisanal textile crafts while elevating contemporary pattern cutting, couture construction, and fashion education for makers globally.
Discussion & Feedback 0
Ask tailoring questions, share results, or contribute technical advice.
No comments posted yet
Be the first to share your thoughts or questions regarding this masterclass.
Leave a Comment
Join the conversation. All messages are moderated for respectful dialogue.